Welcome to my blog to learn how to grow aloe vera in a tub. Aloe vera, known for its soothing and healing properties, is one of the easiest plants to grow at home.
Not only is it a low-maintenance succulent, but it also thrives both indoors and outdoors, making it perfect for urban gardeners and beginners alike.
Growing aloe vera in a tub offers the best of both worlds: it saves space, adds greenery to your surroundings, and gives you access to a natural remedy for burns, cuts, and skin irritations.
Whether you’re living in a small apartment or looking to decorate your patio, learning how to grow aloe vera in a tub is a rewarding gardening project that anyone can handle.
How To Grow Aloe Vera In A Tub?
To grow aloe vera in a tub, I start by picking the right container. I use a terracotta pot with drainage holes to avoid root rot. I fill it with a well-draining cactus or succulent soil mix.
After that, I planted the aloe at the same depth it was in its original pot. I place the tub in a sunny spot, either outside or by a window. Watering is simple.
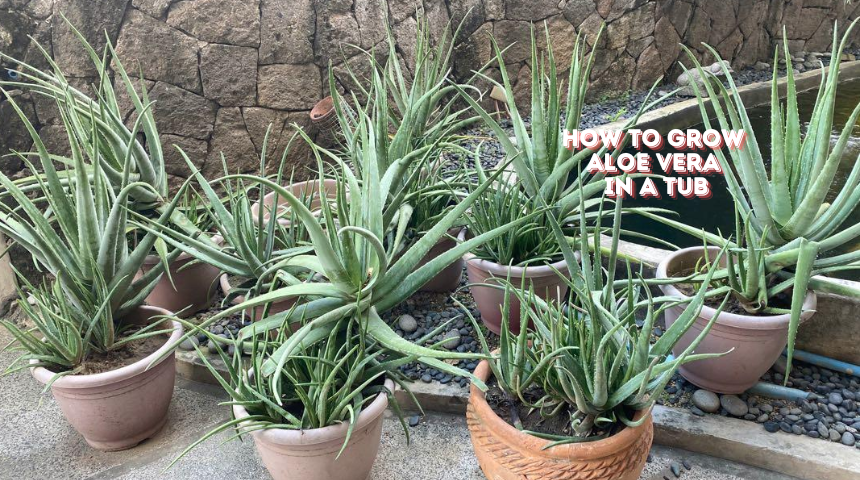
I let the soil dry out completely between waterings. Aloe doesn’t like too much water. With this care, it thrives.
Section 1: Why Grow Aloe Vera In A Tub?
One of the most compelling reasons to grow aloe vera in a tub is that it’s space-efficient. Unlike traditional garden plots, which require plenty of space, growing aloe in a tub is perfect for urban environments where space is at a premium.
A small balcony or a sunny windowsill is all you need to keep this plant thriving. A tub also offers portability. Since aloe vera needs the right amount of light, you can move the tub easily to optimize its exposure to sunlight, ensuring the plant stays healthy throughout the year.
This flexibility is particularly beneficial if you live in a climate where seasons change dramatically. In the winter, you can bring the tub indoors to protect it from frost.
Aloe vera is also a low-maintenance plant that can thrive in various conditions. It requires minimal care, making it ideal for busy individuals who might not have the time or energy for high-maintenance plants.
Plus, its medicinal properties are an added bonus—simply snip off a leaf and apply the gel to burns or cuts for instant relief.
Section 2: Choosing The Right Tub For Aloe Vera
Selecting the right tub is crucial for the success of your aloe vera plant. Material plays an important role. Terracotta pots are ideal because they are porous, allowing excess moisture to evaporate, which reduces the risk of root rot.
On the other hand, plastic tubs can retain moisture, so if you opt for plastic, ensure you monitor your watering schedule closely.
When it comes to size, aloe vera prefers a moderately deep and wide tub. A width of around 12–16 inches and a depth of 8–12 inches is usually ideal.
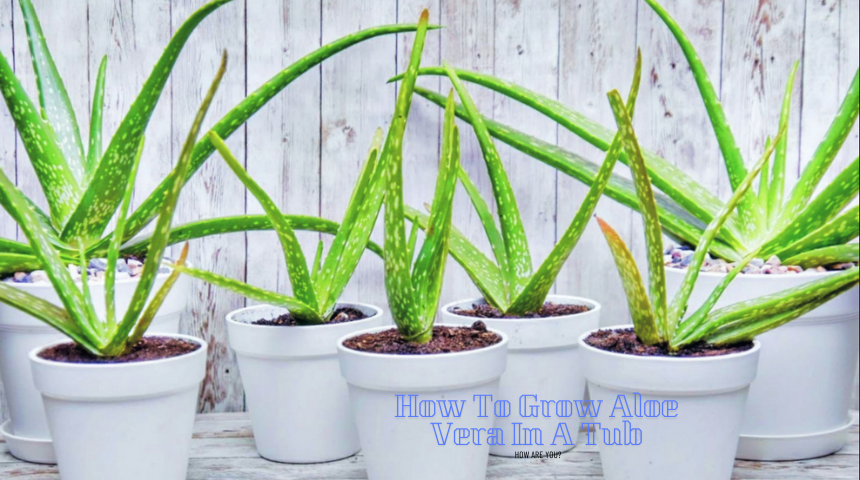
This gives the plant enough space for its roots to spread and grow, without being cramped or waterlogged. If the tub is too small, the aloe may become root-bound, stunting its growth.
Another essential feature is drainage holes. Aloe vera roots are prone to rot if they sit in water for too long. A tub with one or more drainage holes ensures that excess water can escape, preventing the plant from becoming waterlogged.
If you have a decorative tub without drainage, consider placing a smaller pot with drainage inside the decorative one.
Section 3: Preparing The Soil For Aloe Vera
Aloe vera thrives in well-draining soil, which is key to its success in a tub. A mix designed for cacti or succulents works best, as these soil types are specifically formulated to prevent water retention, which can lead to root rot. You can easily find these soil mixes at any garden center.
To further improve drainage, consider adding perlite or coarse sand to the mix. Perlite helps aerate the soil and allows water to drain more freely, ensuring that the roots have access to both air and moisture.
While aloe vera is drought-tolerant, it still needs occasional water, but the goal is to keep the soil light and airy rather than heavy and compacted.
If you’re into organic gardening, you can mix in a small amount of organic matter, such as compost, to give the plant a nutrient boost.
However, avoid using regular garden soil, as it tends to hold too much water, which is harmful for succulents like aloe vera.
Section 4: Planting Aloe Vera In A Tub
Now that you have the right tub and soil, it’s time to plant your aloe vera. Start by filling the tub with soil, leaving about an inch of space from the top. This prevents water from overflowing when you water the plant.
Place the aloe vera plant in the center of the tub. The plant should sit at the same depth it was in its original container. Aloe vera has shallow roots, so there’s no need to bury the plant too deeply.
Firmly pack the soil around the base to secure it in place, but don’t compact it too much as this will restrict airflow to the roots.
If you’re planting aloe vera pups (baby plants), make sure each one has enough space to grow. Separate the pups from the mother plant by gently pulling them apart, ensuring each has its root system. Plant them as you would the larger aloe, ensuring they are upright and stable in the soil.
The best time to plant aloe vera is in the spring or summer when the plant is in its active growing phase. This gives it time to establish strong roots before winter arrives.
Section 5: Watering Aloe Vera In A Tub
Aloe vera thrives on minimal water, making it a perfect plant for those who tend to forget to water their plants. The key is to allow the soil to dry out completely between watering sessions.
Overwatering is one of the biggest causes of aloe vera plant failure, so it’s better to underwater than to water too frequently.
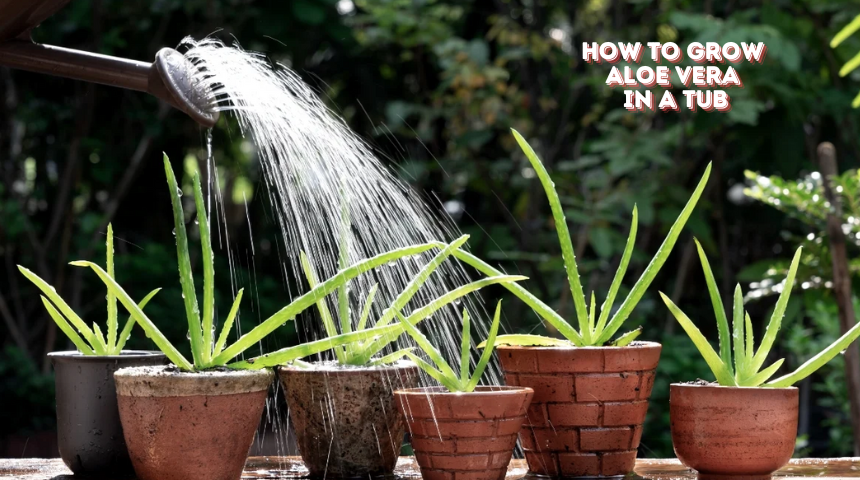
Watering frequency depends on the climate and the size of the tub. In warmer months, you may need to water the plant once every 2-3 weeks. In cooler months, water less frequently, perhaps once a month.
Always check the soil: if it feels dry an inch or two below the surface, it’s time to water. When watering, pour the water slowly and directly onto the soil, avoiding the leaves.
Aloe vera leaves hold water, so getting them wet often leads to rot. Allow the water to drain out of the bottom of the tub, and never let the plant sit in standing water.
Section 6: Providing Proper Sunlight
Aloe vera is a sun-loving plant that thrives in bright, indirect sunlight or full sun. If you’re growing the plant indoors, place it near a south-facing window where it can receive 6-8 hours of light daily.
If you don’t have a sunny spot indoors, consider using a grow light to supplement its needs. For outdoor tubs, place the aloe in a spot where it gets full sun, but be cautious of extremely hot conditions.
Intense, direct sun for long periods can cause the leaves to burn, turning them brown or red. In such cases, provide some partial shade during the hottest part of the day.
Rotate the tub every few weeks to ensure all sides of the plant get equal light. This prevents the aloe from growing unevenly and helps it maintain a balanced, upright shape.
Section 7: Fertilizing Aloe Vera
Aloe vera is a light feeder, meaning it doesn’t require much fertilizer to thrive. Over-fertilizing can actually harm the plant, leading to weak or leggy growth.
A good rule of thumb is to fertilize aloe vera once or twice a year, ideally in the spring or summer when it is in its growing season.
Use a diluted, balanced liquid fertilizer or one specifically designed for succulents. Organic fertilizers, like compost tea, can also be beneficial as they provide slow-release nutrients without overwhelming the plant.
Avoid chemical-heavy fertilizers, as they can cause the leaves to turn yellow or the roots to burn.
Section 8: Troubleshooting Common Aloe Vera Problems
Like any plant, aloe vera can encounter some common issues, especially when grown in a tub.
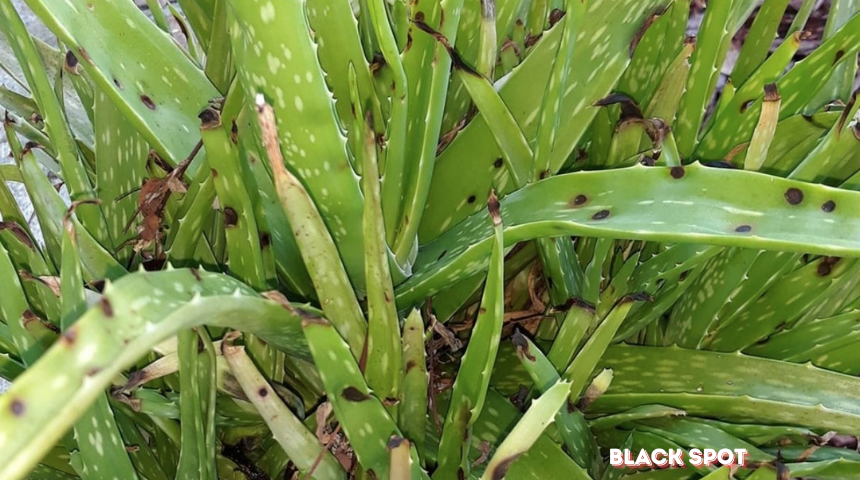
- Root rot: This is usually caused by overwatering or poor drainage. Signs of root rot include a mushy base and wilting leaves. To fix this, remove the aloe from the soil, cut away the rotten roots, and repot in fresh, dry soil.
- Yellowing leaves: This can be a sign of overwatering or too much direct sunlight. Adjust your watering schedule and move the plant to a spot with more indirect light if needed.
- Pests: Aloe vera is generally resistant to pests, but mealybugs or aphids can sometimes appear. A simple solution is to wipe the leaves with a cloth dipped in rubbing alcohol to remove the pests.
FAQ
Can aloe vera grow indoors in a tub?
Yes, aloe vera thrives indoors in a sunny spot, like near a south-facing window. It needs bright, indirect light to grow well indoors.
How often should I repot my aloe vera?
Aloe vera should be repotted every 2-3 years, or when the plant becomes root-bound. Spring is the best time to repot.
What is the best type of soil for aloe vera in a tub?
A well-draining soil mix, such as a cactus or succulent blend, is ideal.
Conclusion
Growing aloe vera in a tub is one of the easiest gardening projects you can start. I love how little care it needs while still looking great in any corner.
With the right soil, the right container, and enough sunlight, this plant practically takes care of itself. Just remember to avoid overwatering. Aloe thrives in dry conditions, so let the soil dry out between waterings.
I find it satisfying to have aloe nearby for its beauty and its medicinal uses. If you’re like me and enjoy simple gardening, this is a perfect plant to grow.
Whether indoors or outdoors, it adapts well to small spaces. Plus, you can move it around easily if needed. In just a short time, you’ll have a healthy, thriving aloe vera plant. Give it a try and enjoy the benefits!

