Welcome to my gardening journey! Today, I’ll guide you on How to grow microgreens without soil. Embrace a soil-free approach for vibrant, nutrient-packed microgreens right at home.
Discover the simplicity of this method as I share my firsthand experience as a dedicated gardener. Uncover the secrets behind soil-less microgreen cultivation in just a few steps.
From choosing the right seeds to providing essential care, I’ll be your companion throughout this enriching process.
Let’s delve into the world of soil-free microgreen gardening and cultivate a miniature garden of health and flavor together. Join me in this exciting venture, and let’s nurture greens in a whole new way!
How To Grow Microgreens Without Soil?
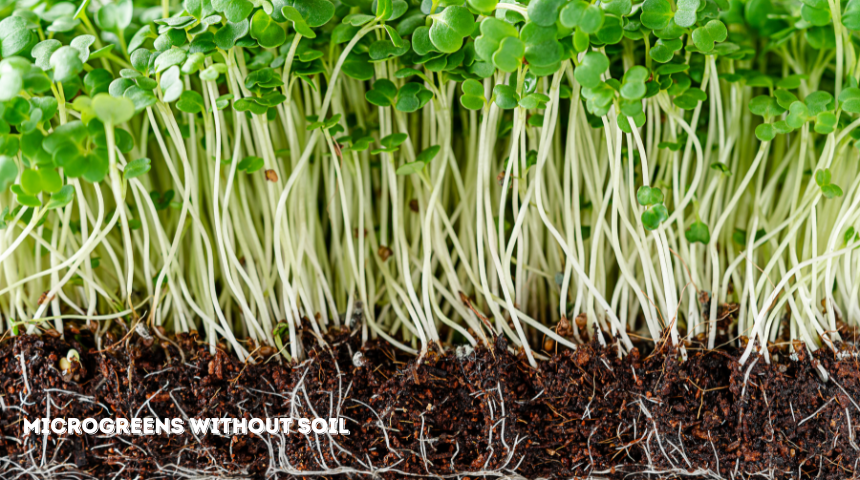
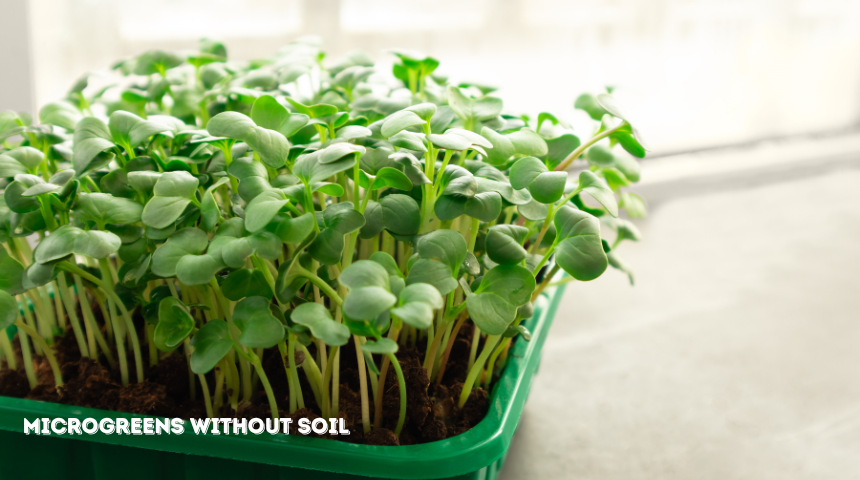
I love growing microgreens without soil, and it’s easier than you think! Choose a shallow container with drainage holes. Spread a layer of moist paper towels at the bottom.
Evenly scatter your microgreen seeds. Mist them with water and cover the container. Please keep it in a warm, well-lit spot. Mist daily to keep them moist.
Once they sprout, uncover and let them grow. Harvest when they reach the desired height. No soil, just fresh, homegrown microgreens on your plate!
Steps For Successful Soilless Microgreen Cultivation
Seed Selection
Choose high-quality microgreen seeds tailored for soilless cultivation. Opt for varieties with robust flavor and nutritional benefits. Ensure seeds are clean and from reliable suppliers.
Growing Medium
Select a suitable soilless medium like coconut coir, vermiculite, or hydroponic pads. Ensure it provides good aeration and water retention for optimal microgreen growth.
Watering Technique
Employ a gentle misting system or bottom watering to keep the growing medium consistently moist. Avoid overwatering, which can lead to mold and other issues.
Lighting Conditions
Provide adequate light for your microgreens, preferably natural sunlight or LED grow lights. Ensure they receive 12-16 hours of light daily to promote healthy growth.
Harvesting at the Right Time
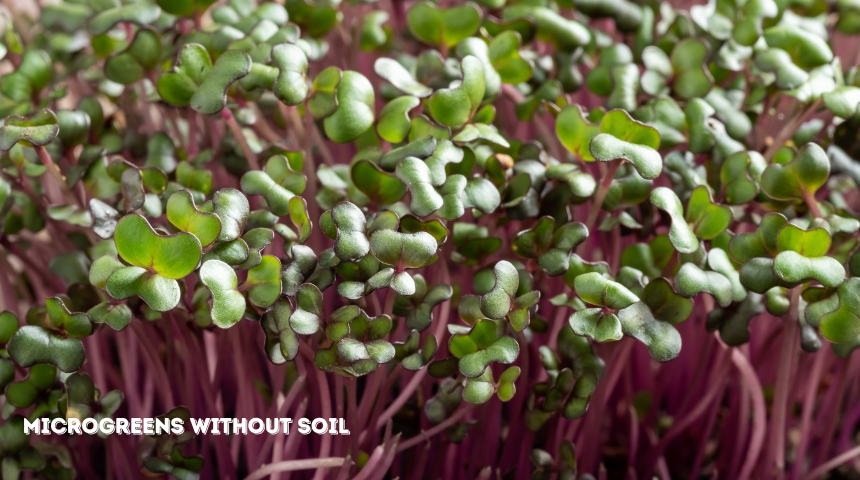
Monitor the growth of your microgreens closely and harvest when they reach the desired height, typically between 7-14 days. Use clean scissors to cut just above the soil surface for a fresh and flavorful harvest.
HOW TO GROW IN THE HYDROPONIC METHOD IS DESCRIBED?
1. System Setup
Begin by setting up a hydroponic system, which involves growing plants without soil, using nutrient-rich water solutions.
2. Choose a Hydroponic System
Select the hydroponic method that suits your space and needs, such as nutrient film technique (NFT), deep water culture (DWC), or aeroponics.
3. Selecting Plants
Opt for plants that thrive in hydroponic environments, such as lettuce, herbs, tomatoes, and strawberries.
4. Growing Medium
Hydroponics replaces soil with inert growing mediums like perlite, vermiculite, or coconut coir to support plant roots.
5. Nutrient Solution
Mix a balanced nutrient solution with essential macro and micronutrients required for plant growth. Monitor and adjust nutrient levels regularly.
6. pH Control
Maintain the pH level of the nutrient solution within the optimal range for the chosen plants, typically between 5.5 and 6.5.
7. Water and Oxygen Supply
Ensure a continuous and well-oxygenated water supply to plant roots, promoting nutrient absorption and preventing waterlogging.
8. Lighting Requirements
Provide adequate artificial lighting or natural sunlight based on the specific needs of the plants being cultivated hydroponically.
9. Monitoring and Adjusting
Regularly check system parameters, including pH, nutrient levels, and water supply, adjusting as needed to ensure optimal plant health.
10. Harvesting
Harvest hydroponically grown plants when they reach maturity, typically faster than traditional soil-based cultivation, leading to efficient and productive harvests.
TWO METHODS ARE DESCRIBED BELOW
1. Coconut Coir Method
Substrate Choice: Utilize coconut coir as a growing medium, which is a natural fiber extracted from coconut husks, providing excellent water retention and aeration.
Preparation: Hydrate coconut coir blocks with water until they expand, creating a fluffy, moisture-retaining substrate suitable for plant growth.
Nutrient Addition: Mix coconut coir with a balanced nutrient solution to provide essential elements for plant development. Ensure proper drainage to prevent waterlogging.
Seeding: Place seeds directly into the coconut coir or use pre-germinated seedlings for easy transplanting. Monitor moisture levels for consistent germination.
Maintenance: Regularly water the coconut coir to maintain optimal moisture levels. Adjust nutrient solutions based on plant growth stages.
2. Perlite Method
Perlite as a Medium: Choose perlite, a lightweight volcanic rock material, as the growing medium. Perlite provides aeration and prevents soil compaction.
Mixing with Soil: Combine perlite with soil to enhance drainage and aeration. Use a perlite-to-soil ratio suitable for the specific plant requirements.
Container Gardening: Employ perlite in container gardening to improve soil structure, promoting healthier root systems and facilitating nutrient uptake.
Hydroponic Systems: Integrate perlite into hydroponic systems for its inert nature, which allows it to support plants without interfering with nutrient solutions.
Moisture Retention: While perlite enhances drainage, it does not retain water. Ensure consistent watering to meet the moisture needs of plants growing in perlite.
THE BENEFITS OF GROWING MICROGREENS WITHOUT SOIL
1. Nutrient Concentration
Growing microgreens without soil allows for precise control of nutrient solutions, ensuring higher concentrations of essential vitamins and minerals for plant development.
2. Space Efficiency
Soilless cultivation is space-efficient, making it suitable for urban gardening or limited spaces where traditional gardening may be impractical.
3. Faster Growth Rates
Microgreens grown without soil often exhibit faster growth rates, enabling a quicker harvest and a more efficient production cycle.
4. Reduced Disease Risk
Soilless methods minimize the risk of soil-borne diseases, providing a cleaner and healthier environment for microgreen cultivation.
5. Water Conservation
Soilless systems typically use less water than traditional soil-based methods, contributing to water conservation and sustainability in agriculture.
6. Year-Round Cultivation
Growing microgreens without soil allows for year-round cultivation, independent of seasonal changes, providing a consistent supply of fresh greens.
7. Precise Environmental Control
Soilless cultivation enables precise control over environmental factors such as pH, temperature, and light, optimizing conditions for microgreen growth.
8. Clean Harvests
Harvesting microgreens without soil results in cleaner produce, free from soil particles, making them ready for consumption without extensive washing or cleaning.
CONS OF GROWING MICROGREENS WITHOUT SOIL
1. Limited Nutrient Content
Soilless cultivation may lack some naturally occurring soil-based nutrients, potentially leading to microgreens with a slightly different nutrient profile.
2. Dependency on Nutrient Solutions
Microgreens grown without soil depend on nutrient solutions, and any imbalance or inadequacy in the solution may affect plant health and growth.
3. Initial Setup Costs
Establishing a soilless microgreen system may involve higher initial setup costs, including purchasing equipment, growing mediums, and nutrient solutions.
4. Technical Expertise Required
Successful soilless cultivation demands a certain level of technical expertise in managing nutrient solutions, pH levels, and environmental conditions.
5. Equipment Maintenance
The machinery and equipment used in soilless systems may require regular maintenance, adding an extra layer of effort and potential costs.
6. Environmental Impact of Growing Mediums
Some soilless growing mediums, such as rock wool or certain plastics, may have environmental implications. Disposal or recycling of these materials needs careful consideration for sustainability.
HARVESTING AND STORING SOILLESS MICROGREENS
Harvesting and storing soilless microgreens is a simple yet crucial process in ensuring their freshness and flavor.
Using clean scissors, carefully cut the microgreens just above the soil surface once they reach the desired height, typically between 7-14 days after germination.
To store, gently wash the harvested microgreens in cold water and pat them dry with a clean cloth or paper towel.
Place them in a breathable container, such as a perforated plastic bag or airtight container lined with a paper towel, and store them in the refrigerator.
Soilless cultivation often results in cleaner harvests, reducing the need for extensive washing before consumption.
Enjoy the vibrant taste and nutritional benefits of your homegrown soilless microgreens in various culinary creations.
HOW DO YOU SPROUT WITHOUT SOIL?
Sprouting without soil is a straightforward and rewarding process. Here’s a simple guide:
1. Select Your Seeds
Choose high-quality seeds suitable for sprouting. Common choices include alfalfa, broccoli, radish, fenugreek, Amaranth, Basil, Beet, Cabbage, Chives, Cilantro, Kale, Parsley, Sunflowers, etc.
2. Rinse the Seeds
Begin by thoroughly rinsing the seeds under cool running water to remove any debris or impurities.
3. Soak the Seeds
Place the seeds in a clean, water-filled container. Allow them to soak for the recommended time, usually 4-8 hours or overnight.
4. Drain and Rinse
After soaking, drain the water and rinse the seeds again. Use a fine-mesh sieve or sprouting jar with drainage holes.
5. Choose a Sprouting Method
Opt for a suitable sprouting method, such as a jar, tray, or sprouting bag, depending on your preference and available equipment.
6. Rinse Twice Daily
Continue rinsing the seeds twice a day, ensuring they remain consistently moist. Use clean water and drain thoroughly.
7. Observe Germination
As the seeds germinate, tiny sprouts will emerge. This process usually takes a few days, but times may vary based on the seed type.
8. Harvest and Enjoy
Once the sprouts reach the desired length, typically 1-2 inches, they are ready to harvest. Rinse them once more and enjoy them in salads, sandwiches, or nutritious snacks.
Sprouting without soil is an excellent way to produce fresh and crunchy sprouts rich in vitamins and enzymes.
FAQ
How do I choose the right seeds for soilless microgreen cultivation?
Opt for high-quality microgreen seeds suitable for soilless methods, considering flavor preferences and nutritional content.
Can I use regular soil for growing microgreens without soil?
No, choose soilless mediums like coconut coir or hydroponic pads to ensure proper aeration and nutrient control.
How often should I water soilless microgreens?
Water regularly to maintain consistent moisture levels, ensuring the growing medium is damp but not waterlogged.
What light conditions are best for soilless microgreen growth?
Provide 12-16 hours of daily light, either from natural sunlight or artificial grow lights, to support healthy microgreen development.
How do I harvest and store soilless microgreens?
Use clean scissors to cut microgreens just above the soil surface when they reach the desired height. Wash, dry, and store in a breathable container in the refrigerator for freshness.
Conclusion
Growing microgreens without soil has been a delightful journey, and I’m thrilled you joined me! From vibrant arugula to zesty radishes, the possibilities are endless.
Embracing a soilless approach not only yields nutrient-packed greens but also offers a clean and efficient way to cultivate your mini garden.
Remember to choose top-notch seeds, maintain the right moisture, and revel in the joy of a bountiful harvest.
Happy planting, and may your home be forever graced with the goodness of fresh, homegrown microgreens without soil!


